
.webp)
Before you run away, we’re here to tell (and show) you that refinishing your cabinets is an attainable DIY. Cabinets might not be as critical as a solid foundation or reliable support beams. However, no one walks into your kitchen and says, “Wow, those load-bearing walls look so sturdy!” They’ll notice details like the granite countertops, vintage-style parquet flooring, and, of course, your stunning refinished cabinets.


Depending on the size of your kitchen, this could be a project that takes multiple days, and it will take quite a bit of elbow grease. Don’t fret, though — Spoak has your back. We will take you step-by-step through how to make your cabinets look brand new.
The first (and obvious) step is to prepare your workspace: clear out the cabinets and kitchen counters, including the toaster and the house plant you keep forgetting to water.
You’ll need two items for the next step: painter’s tape and builder’s paper. To be fair, you could also use towels and rags or a drop cloth, depending on how scrappy you are. However, painter’s tape and builder’s paper are preferred for their neatness and will do a better job of protecting surfaces. Plus, builder’s paper is effective, easily replaceable, and recyclable.
Lay down the builder’s paper onto all the countertops and floor and cut off any excess for a perfect fit. You may want to do two layers for the floor because the simple act of walking on the paper can rip and tear at it. Seal the seams neatly with painter’s tape.
After the blue tape is applied, take a box cutter with a new, sharp blade and carefully cut off any excess tape overlapping on the cabinets. (Your countertops will double as your work surface unless you have a large garage with ample tabletop workspace.)
Open your toolbox and pull out your screwdriver. Screwdrivers come in many forms, but most cabinet removals call for the standard Phillips-head screwdriver with a #2 screw tip. Be wary not to damage the cabinet box while you’re removing the doors. Otherwise, you’ll have a mess on your hands for later!
After placing them on the counter or work surface, thoroughly clean off the doors and the insides of the cabinet boxes by dusting and wiping them with a cleaning solution. If you attempt to rush the job by skipping the cleaning part, the priming materials and stains may not adhere to the wood finish. We repeat: Don’t skimp out on the cleaning step! For harder stains like grease and food residue, use synthetic steel wool and soapy water to remove them from the doors.
This next step is where you will see all of your prep work pay off — the actual refinishing of your cabinets. You will now begin the process of actually sanding down and refinishing the pieces.
You can either use fine-grit sandpaper or a medium-grit sander sponge. If you plan to paint your cabinets, sand down to the original wood cabinet finish with a sanding block. The wood or laminate needs to have enough roughness to it to promote adhesion. If you’re planning to showcase the natural wood of your cabinets, you’ll need a more even surface.
After everything is sanded down, remove most of the dust with, ideally, a shop vac or tack cloth. If you don’t have access to one, simply wipe down as much dust as you can with a dry rag. Then, take a slightly damp rag and wipe down the remainder of the dust.
Choosing the right primer is vital to the success of your project — the wrong primer can cause cabinets to chip over time. The wrong primer can even cause cabinets to slowly bleed primer, leaving the colorful new look as drab as an office supply store.
Try to find a high-quality primer with a low odor, that way your family can live in your home while you work on the project (no headaches necessary). The best primers for cabinet painting will dry very quickly; some allow the first layer to be dry to the touch within roughly 30 minutes. A primer will help keep the finish free of dust, making your kitchen cabinet refinishing project easier.
Primers can be applied with a few different tools of your choosing: sprayers, brushes, or rollers. The most common tool used is the humble brush, which can give your cabinets that handmade flair. The best brushes for priming are brushes with very fine nylon bristles; they tend to do a better job of not leaving brush marks.
Brush your primer onto the surfaces evenly, and do not allow any to pool or drip anywhere for an evenly distributed coat. If your primer does not dry within 40 minutes, it’s a sure sign you’ve used too much (it happens) and will likely need to sand down the excess after it’s completely dried.
After the second coat of primer has been applied and allowed to dry completely, it’s time to sand again. Sand all the primed surfaces with the same tools as before, but to a lesser degree of applied force. Wipe down the surfaces and apply caulking if needed, and sand that down.
Now, it’s time to paint your cabinets and get the makeover you’ve been waiting for! Apply at least two coats of the color paint of your choosing with a paintbrush rather than.
Apply three coats to the contact surfaces, like on the interior borders of the cabinets and near the hinges, for longevity. Contact points will wear out much faster than the other parts and could result in uneven-looking finishes. The brush technique used during the priming is the same as what you will use for painting.
If you’d like, you can add a polyurethane varnish to protect the paint, but this step is completely optional.
After the paint has dried, it’s time to reinstall your new cabinets. Use regular hand tools for the screws, knobs, drawer pulls, and hinges. Power tools can easily cause the screws to get stripped (making it harder for you to use them) and create installation problems — proceed with caution!
Use Spoak’s design tools to see what your kitchen could look like and virtually reimagine everything from your kitchen’s color scheme, look, and feel. Our suite of design tools allows homeowners and interior designers to recreate their kitchen down to the finest details for an accurate preview of what it could look like — from potential cabinet layouts to different paint colors and more.
If you’re already a member: To start a brand new DIY project, click “Tools'' in the upper left corner of your Spoak dashboard.
Then, click “Project Planner” to see a list of your open projects. At the bottom left side of the window, you will find a “Create New Project” tab with two options: “From Scratch” and “With Project Wizard.”
The “From Scratch” option is pretty straightforward — you’ll start a new project with a completely blank canvas for you to fill on your own. On the other hand, the “With Project Wizard” option will start by asking you some questions to help get you started on the right track.
After recreating the basic layout of your kitchen, add the same type of cabinets you have, but in the new color scheme you want, to visualize your new cabinets.
Kitchen remodels are an art form, and you are the artist! Everything from the cabinet hardware to the tile backsplash sets the stage for the most important room in the house. Kitchens are where you meet, eat, and retreat from the busy world outside. It’s no wonder that the kitchen is the most frequented room in the house.
Not only is it the most popular spot to hang out, but it’s also the most popular room to remodel, according to 81% of remodelers.
Sources:
8 Times to Never, Ever Skip Paint Primer | Bob Vila
Adhesive strength and micromechanics of wood bonded at low temperature | ScienceDirect
Paint Adhesion Failures | SFGATE
How to Adjust Cabinet Doors | The Spruce
Kitchen is the most used room in the house | Las Vegas Review-Journal
America's Most Popular Home Remodeling Projects — And What They'll Cost You | Forbes

Before you run away, we’re here to tell (and show) you that refinishing your cabinets is an attainable DIY. Cabinets might not be as critical as a solid foundation or reliable support beams. However, no one walks into your kitchen and says, “Wow, those load-bearing walls look so sturdy!” They’ll notice details like the granite countertops, vintage-style parquet flooring, and, of course, your stunning refinished cabinets.
Depending on the size of your kitchen, this could be a project that takes multiple days, and it will take quite a bit of elbow grease. Don’t fret, though — Spoak has your back. We will take you step-by-step through how to make your cabinets look brand new.
The first (and obvious) step is to prepare your workspace: clear out the cabinets and kitchen counters, including the toaster and the house plant you keep forgetting to water.
You’ll need two items for the next step: painter’s tape and builder’s paper. To be fair, you could also use towels and rags or a drop cloth, depending on how scrappy you are. However, painter’s tape and builder’s paper are preferred for their neatness and will do a better job of protecting surfaces. Plus, builder’s paper is effective, easily replaceable, and recyclable.
Lay down the builder’s paper onto all the countertops and floor and cut off any excess for a perfect fit. You may want to do two layers for the floor because the simple act of walking on the paper can rip and tear at it. Seal the seams neatly with painter’s tape.
After the blue tape is applied, take a box cutter with a new, sharp blade and carefully cut off any excess tape overlapping on the cabinets. (Your countertops will double as your work surface unless you have a large garage with ample tabletop workspace.)
Open your toolbox and pull out your screwdriver. Screwdrivers come in many forms, but most cabinet removals call for the standard Phillips-head screwdriver with a #2 screw tip. Be wary not to damage the cabinet box while you’re removing the doors. Otherwise, you’ll have a mess on your hands for later!
After placing them on the counter or work surface, thoroughly clean off the doors and the insides of the cabinet boxes by dusting and wiping them with a cleaning solution. If you attempt to rush the job by skipping the cleaning part, the priming materials and stains may not adhere to the wood finish. We repeat: Don’t skimp out on the cleaning step! For harder stains like grease and food residue, use synthetic steel wool and soapy water to remove them from the doors.
This next step is where you will see all of your prep work pay off — the actual refinishing of your cabinets. You will now begin the process of actually sanding down and refinishing the pieces.
You can either use fine-grit sandpaper or a medium-grit sander sponge. If you plan to paint your cabinets, sand down to the original wood cabinet finish with a sanding block. The wood or laminate needs to have enough roughness to it to promote adhesion. If you’re planning to showcase the natural wood of your cabinets, you’ll need a more even surface.
After everything is sanded down, remove most of the dust with, ideally, a shop vac or tack cloth. If you don’t have access to one, simply wipe down as much dust as you can with a dry rag. Then, take a slightly damp rag and wipe down the remainder of the dust.
Choosing the right primer is vital to the success of your project — the wrong primer can cause cabinets to chip over time. The wrong primer can even cause cabinets to slowly bleed primer, leaving the colorful new look as drab as an office supply store.
Try to find a high-quality primer with a low odor, that way your family can live in your home while you work on the project (no headaches necessary). The best primers for cabinet painting will dry very quickly; some allow the first layer to be dry to the touch within roughly 30 minutes. A primer will help keep the finish free of dust, making your kitchen cabinet refinishing project easier.
Primers can be applied with a few different tools of your choosing: sprayers, brushes, or rollers. The most common tool used is the humble brush, which can give your cabinets that handmade flair. The best brushes for priming are brushes with very fine nylon bristles; they tend to do a better job of not leaving brush marks.
Brush your primer onto the surfaces evenly, and do not allow any to pool or drip anywhere for an evenly distributed coat. If your primer does not dry within 40 minutes, it’s a sure sign you’ve used too much (it happens) and will likely need to sand down the excess after it’s completely dried.
After the second coat of primer has been applied and allowed to dry completely, it’s time to sand again. Sand all the primed surfaces with the same tools as before, but to a lesser degree of applied force. Wipe down the surfaces and apply caulking if needed, and sand that down.
Now, it’s time to paint your cabinets and get the makeover you’ve been waiting for! Apply at least two coats of the color paint of your choosing with a paintbrush rather than.
Apply three coats to the contact surfaces, like on the interior borders of the cabinets and near the hinges, for longevity. Contact points will wear out much faster than the other parts and could result in uneven-looking finishes. The brush technique used during the priming is the same as what you will use for painting.
If you’d like, you can add a polyurethane varnish to protect the paint, but this step is completely optional.
After the paint has dried, it’s time to reinstall your new cabinets. Use regular hand tools for the screws, knobs, drawer pulls, and hinges. Power tools can easily cause the screws to get stripped (making it harder for you to use them) and create installation problems — proceed with caution!
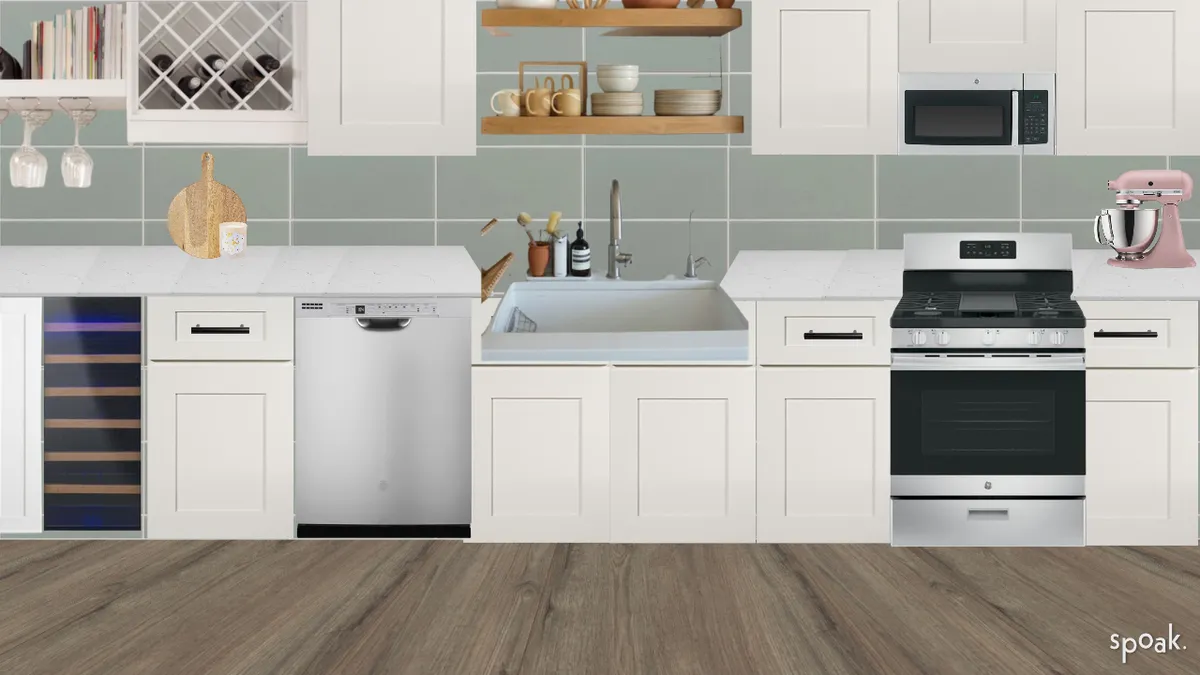
Use Spoak’s design tools to see what your kitchen could look like and virtually reimagine everything from your kitchen’s color scheme, look, and feel. Our suite of design tools allows homeowners and interior designers to recreate their kitchen down to the finest details for an accurate preview of what it could look like — from potential cabinet layouts to different paint colors and more.
If you’re already a member: To start a brand new DIY project, click “Tools'' in the upper left corner of your Spoak dashboard.
Then, click “Project Planner” to see a list of your open projects. At the bottom left side of the window, you will find a “Create New Project” tab with two options: “From Scratch” and “With Project Wizard.”
The “From Scratch” option is pretty straightforward — you’ll start a new project with a completely blank canvas for you to fill on your own. On the other hand, the “With Project Wizard” option will start by asking you some questions to help get you started on the right track.
After recreating the basic layout of your kitchen, add the same type of cabinets you have, but in the new color scheme you want, to visualize your new cabinets.
Kitchen remodels are an art form, and you are the artist! Everything from the cabinet hardware to the tile backsplash sets the stage for the most important room in the house. Kitchens are where you meet, eat, and retreat from the busy world outside. It’s no wonder that the kitchen is the most frequented room in the house.
Not only is it the most popular spot to hang out, but it’s also the most popular room to remodel, according to 81% of remodelers.
Sources:
8 Times to Never, Ever Skip Paint Primer | Bob Vila
Adhesive strength and micromechanics of wood bonded at low temperature | ScienceDirect
Paint Adhesion Failures | SFGATE
How to Adjust Cabinet Doors | The Spruce
Kitchen is the most used room in the house | Las Vegas Review-Journal
America's Most Popular Home Remodeling Projects — And What They'll Cost You | Forbes
We are an online interior design studio for enthusiasts and professionals. Get a real-world design education, easy-to-use tools, job opportunities, and a tight-knit community. All levels welcome.
Join now
